What Is Manga Colorization?
Manga colorization is the process of adding color to black-and-white manga pages. Most manga is published in grayscale — it's a stylistic tradition and a practical decision (color printing is expensive). But readers increasingly want to experience their favorite series in full color.
Colorization can be done manually by artists in Photoshop or Clip Studio Paint, or automatically using AI tools. The manual approach gives you full creative control but takes hours per page. AI tools can process entire chapters in minutes, though the results depend heavily on the tool you use.
Manual Colorization vs AI Colorization
Manual colorization means a human artist paints over each panel by hand. Professional colorists use techniques like flat coloring, cel shading, and gradient work to bring pages to life. The results can be stunning, but the time cost is significant — expect 2-4 hours per page for quality work.
AI colorization uses machine learning models to predict and apply colors automatically. Modern AI models understand context like skin tones, hair colors, backgrounds, and lighting. The tradeoff is less granular control, but the speed advantage is enormous — hundreds of pages per hour instead of per week.
For most creators and scanlation teams, AI colorization is the practical choice. The quality has reached a point where readers can't easily tell the difference, especially when you use character palettes to maintain color consistency.
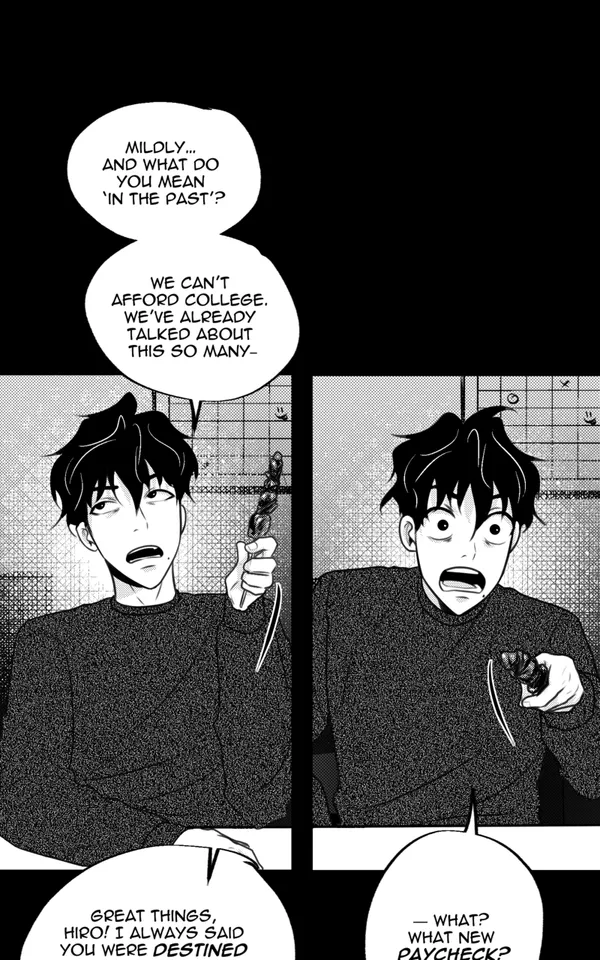 B&W
B&W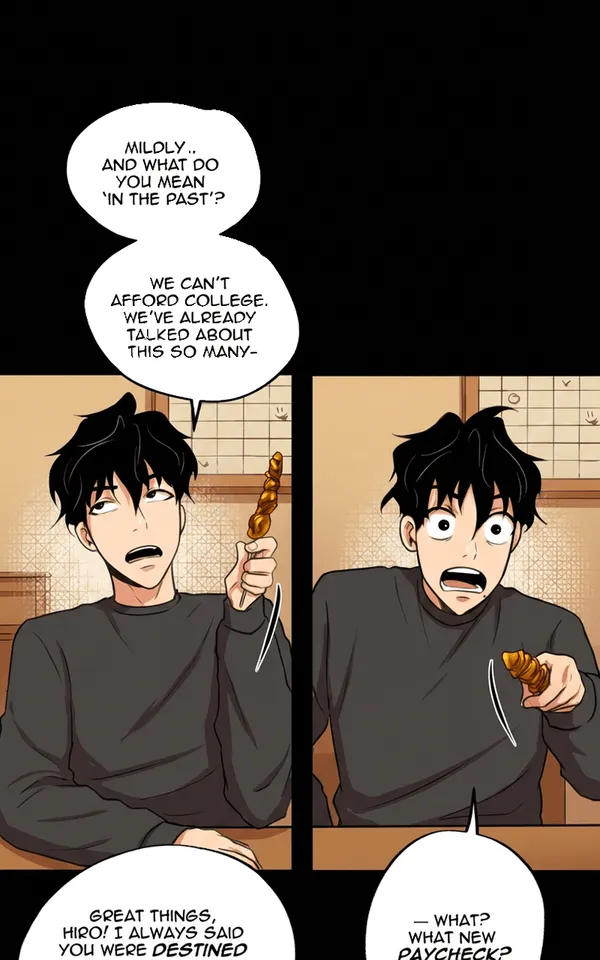 Color
ColorHow to Colorize Manga with Watashi Colorizer
Step 1: Upload Your Images
Create a new project and upload your black-and-white manga pages. Watashi Colorizer accepts PNG, JPG, and WebP formats. You can upload an entire chapter at once — the tool is designed for bulk processing, not one image at a time.
Step 2: Choose Your Model
Select the AI model that fits your needs. Flash mode is fast and affordable (2 credits per image), ideal for testing and iteration. Pro mode uses a more powerful model (3 credits per image) for higher quality results with better detail preservation and color accuracy.
Step 3: Set Up a Character Palette (Optional)
If you want consistent character colors across your chapter, create or select a character palette. Describe each character's colors — hair, eyes, skin, clothing — and the AI will follow these descriptions throughout every batch. This is what prevents the 'protagonist's hair changes color every page' problem.
Step 4: Colorize
Select your images and hit colorize. The tool automatically splits your pages into optimal batches, stitches them together for the AI to process with cross-panel context, and reassembles the results. You'll see progress in real-time as each batch completes.
Step 5: Review and Edit
Review the colorized results. If any images need adjustment, use the edit mode to re-colorize individual images with custom instructions — like 'make the sky more orange for a sunset scene' or 'this character's jacket should be blue, not green.'
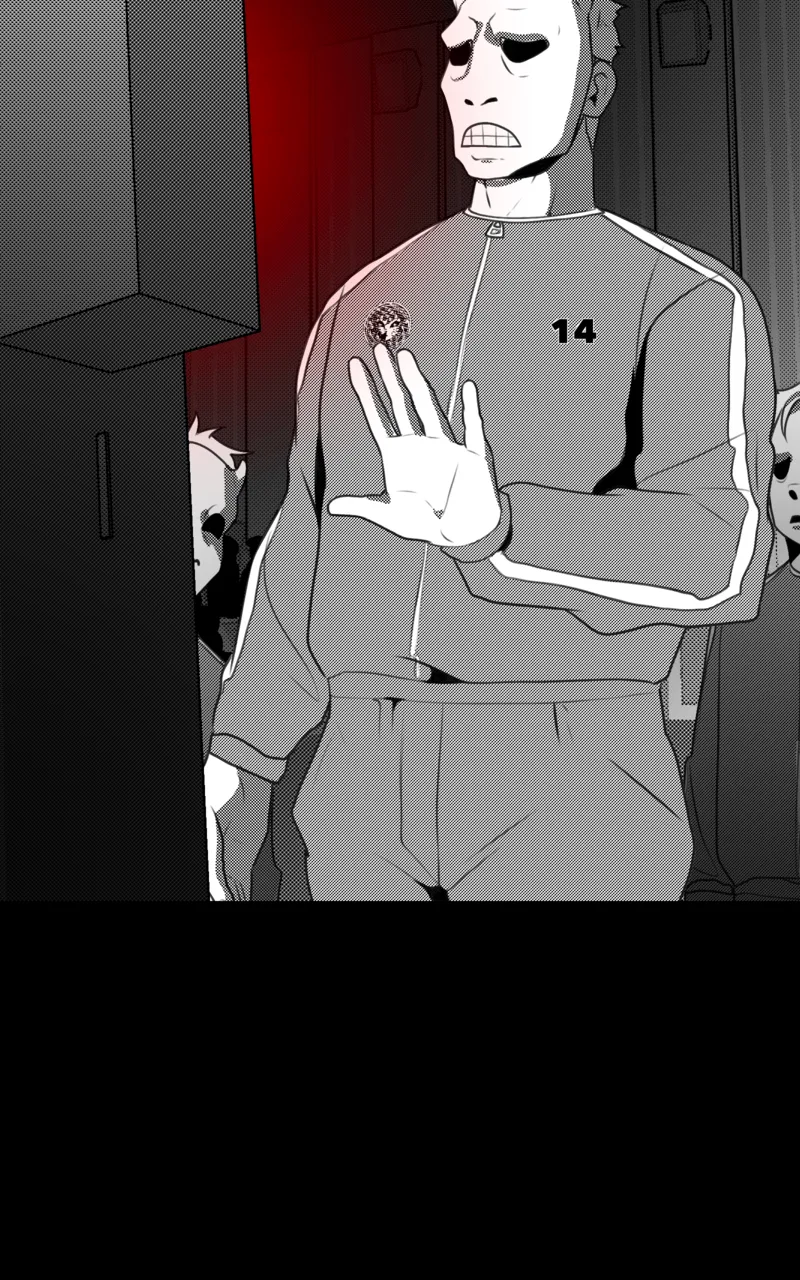 B&W
B&W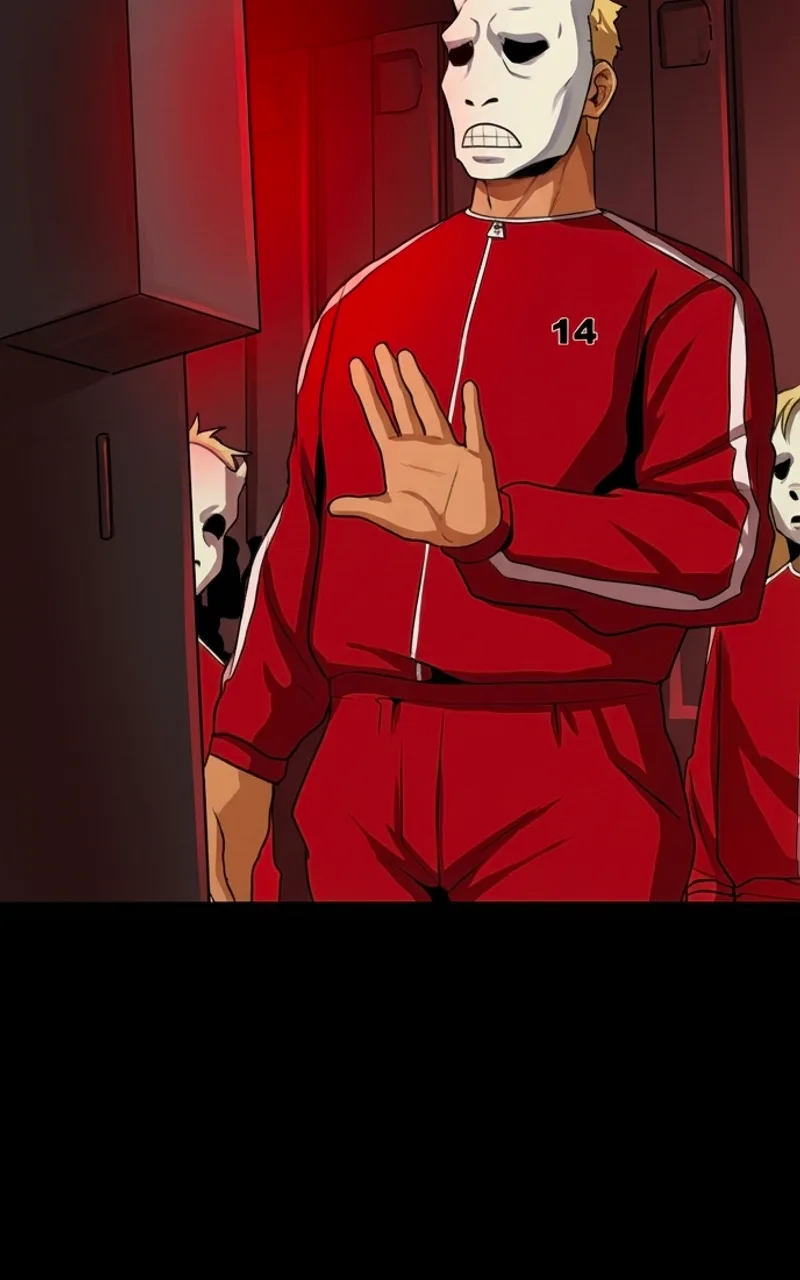 Color
Color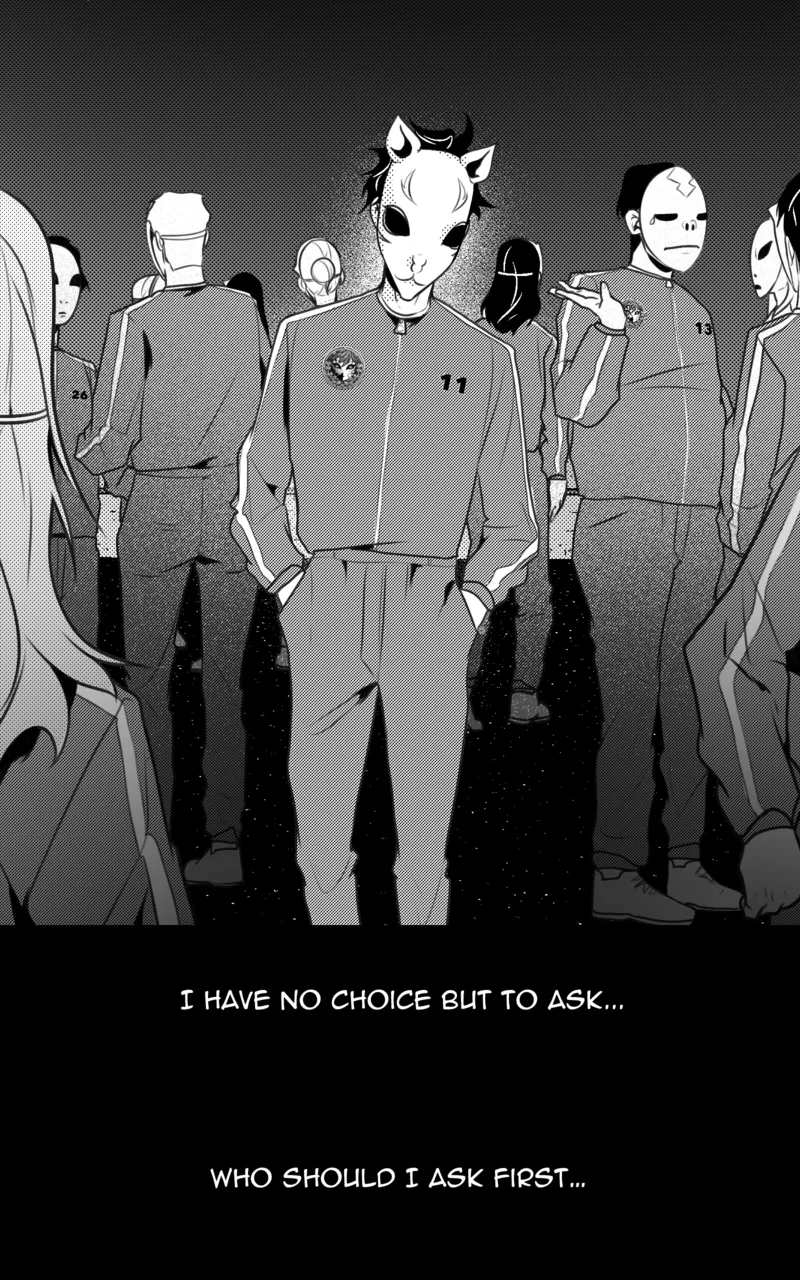 B&W
B&W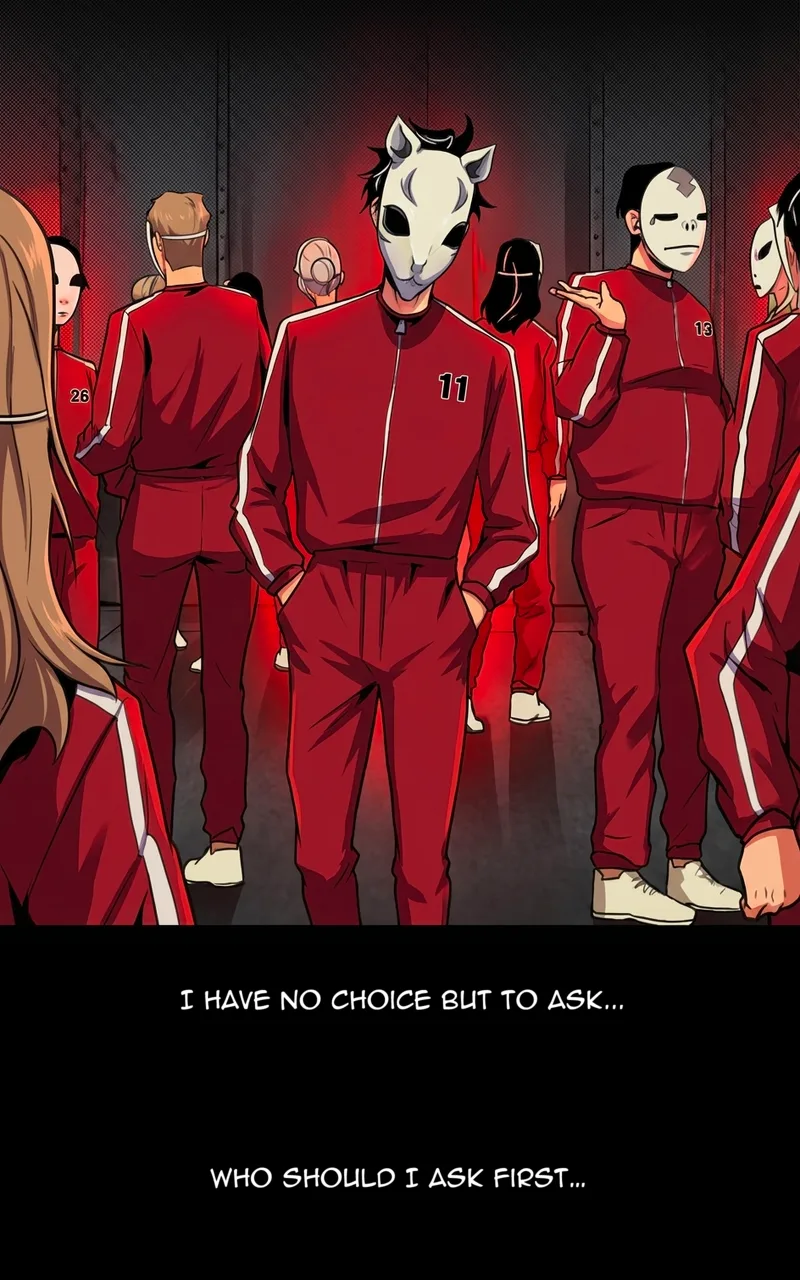 Color
ColorTips for Best Results
Use high-resolution source images
The AI produces better results with clean, high-resolution inputs. Avoid heavily compressed JPEGs or tiny thumbnails. 1200px width or higher is ideal.
Set up character palettes for series work
If you're colorizing multiple chapters of the same series, invest the time to create a character palette. It takes 5 minutes and saves hours of inconsistency headaches.
Process full chapters, not individual pages
The batching system works best when it can see multiple pages in sequence. This gives the AI visual context for color decisions across scene transitions.
Use edit mode for problem panels
Don't re-colorize an entire chapter because one panel looks off. Use edit mode to fix specific images with targeted instructions.